Create API Key
Learn how to create an API key for the Cliova Email Validation API by following these simple steps.
Step-by-Step Guide
Step 1: Log in to the Dashboard
Visit dashboard.cliova.com and log in with your account credentials. If you don’t have an account, sign up and verify your email.
Step 2: Navigate to the API Keys Section
Once logged in, go to the API Keys section by visiting dashboard.cliova.com/api-keys.
Step 3: Click "Create API Key"
In the API Keys section, click the "Create API Key" button. Refer to the screenshot below for guidance:
(Add a screenshot here showcasing the API Keys page with the "Create API Key" button highlighted.)
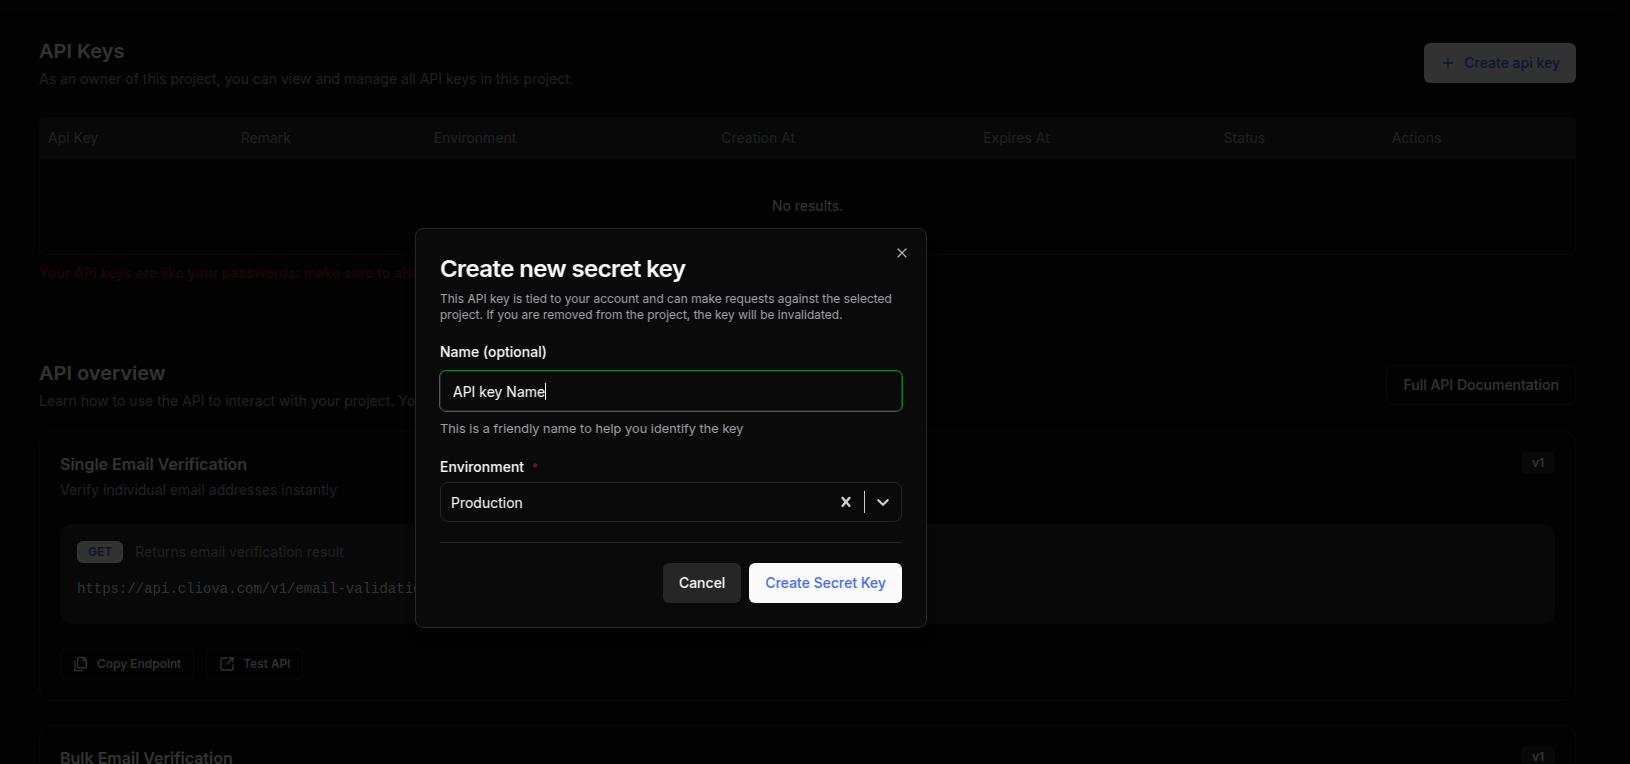
Step 4: Add a Remark (Optional)
While creating your API key, you can optionally add a remark to label or describe the key for future reference.
Step 5: Select environment
Select the environment of API key, If it is for testing purpose select "Sandbox" else Select "Production".
Step 6: Copy the API Key
Once the API key is generated, copy it and save it securely. Ensure you store it in a safe place, as it won’t be fully visible again after creation.
Best Practices for API Key Usage
- Secure Storage: Store your API key securely and avoid sharing it publicly.
- Environment Separation: Use different API keys for development, testing, and production environments.
- Regenerate if Compromised: If you suspect your key has been exposed, immediately regenerate it from the dashboard.